About Me

I started this blog at the urging of my AK friends to help relay my moving to WA. I'm hoping this blog will evolve into a place where I share my home-decorating/remodeling, craft projects, and adventures in dog-ownership.

Thanks for reading!!

Christina - wrangell.penguin@gmail.com
Showing posts with label Home DIY. Show all posts

Sunday, September 8, 2013

Lamp- paper

I got this lamp from a friend at my leaving AK garage sale. I've been wanting to change it for a while.

Couple weeks ago I was spray painting all kinds of stuff and decided it was time. Lamp went from brown and red to modern all robin's egg blue.

But I only had the one lampshade, and it was boring. So I used my pinterest as reference and punched a lot of circles then started glue gunning, while watching Doctor Who.

I'm very happy with result.

Master Bathroom Redux

First project add high shelf!

Second project new floors...


Those are my new grout stepping stones, because I read Gallon instead of Quarts, for how much water to add... Grout the second time went much better.


This is after the magical polishing liquid. (Stone Enhancer)

And with new toilet.
I'll try to get a picture of the complete bathroom, but it's so tiny it's hard to frame.  I painted the walls grey, put in a new light fixture, the new floor, and finally a new YELLOW submarine shower curtain.

Door Decoration, continued...


So I did this  2 years ago.

http://wrangellicious.blogspot.com/2011/09/door-decoration-finally.html
It's held up well but some of the fabric was starting to come loose around the handle (where we touch it all the time) and at the bottom (I blame the dog noses).

I decided to do some touch up.  I made much less cornstarch goo, but when I finished my touch ups (which worked awesome!!!) I still had a lot left.

Upstairs are 3 bedrooms and 1 bathroom, Wrangell and Penguin will eat anything, shoes, blankets, pillows, stuffed animals, paper, so we keep the doors shut. 4 white doors looked very boring, so I decided to add some color. I went through my fabric scraps, found 4 patterns that would fit in the panels, did more ripping then cutting. Ironed the fabric, then started goo-ing.  They are holding up great, clean up was super easy, and it got me to reclean the doors, which has been on my to do list.
Here they are:


Sunday, February 19, 2012

James Bond Theme Cocktail Party

I couldn't find many DIY ideas for a grown-up James Bond Theme Cocktail Party (on the cheap).
I went to the thrift store got lots of playing cards and a piece of felt from JoAnns.  And got to work w/my sewing machine.  I cut out about 10 guns from the felt and put them on the bottom of 5-9 card garlands. Super easy to just sew a straight line!! I also made some longer garland with felt "bullets" intermixed.


Playing card and gun garland for James Bond Theme Party


Champagne Jello Shots
http://www.marthastewart.com:80/recipe/dessert-wine-gelees-with-citrus-fruit


Monday, November 14, 2011

Let there be light

solo thais: DIY LIGHTING {hemp pendant light}
I don't know how long ago I saw this plan, but I was thinking that it would be perfect for our master bathroom. But after much discussions and an IKEA trip, decided that we wanted a funky chandelier for the bathroom and the pendant light would work well in our too dark living room.

I gathered all the supplies: hemp, table covering, tacky glue, (later mod podge too), large rubber ball.
And set to work, in the beginning it went really well, smearing the glue on the hemp with my hands, then letting it stick to the ball. But then the glue was getting harder to use, so I added water - which helped, then I began laying the hemp on the ball and then putting the glue directly on the hemp. Finally the ball string was such a sticky chaotic thing that I just put the hemp on without any glue. When I got to a stopping point (11:30 pm on a work night), I began to dump on as much glue as possible, and got the mod podge out too.

Next morning I did and extra coat of clear spray paint, just because.
I waited another day to take out the rubber ball, to let the glue completely cure.


Saturday, September 10, 2011

Door Decoration, finally

I had to try this!

The Plan
The means - Corn starch goop


I got it looking nice mostly everywhere except the bottom.  And then I realized that I could remove the kick plate.  And then, of course, I could spray paint the kick plate.
Close enough...


And finished!!

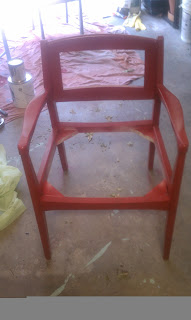
Chairs Prettified


Ombre Dressers

Ombre is "in"
And I needed an easy weekend project.  These dressers my parents got in California in the 70s before they moved to AK, and then I had them all growing up and they moved from AK to WA with me.  So they have definitely been used, and the light blond wood isn't matching.

I need to get better at my before pictures but here they are...


I decided that I wanted the paint to last so I sanded and primed before starting the real painting.

I then mixed white with the brown to make 3 different tints.  I painted the top of the dressers and the top drawers the lightest brown shade. I painted the sides of the dresser the original brown, and the other 2 drawers the other 2 tints.


I let it all dry overnight, did a coat of clear spray paint, waited another day and then moved them back into the house.